
Many educators and general folks are excited about the horizons we are moving towards with the advances of augmented reality in our society. To be able to remain in our current reality and simply will and simply add or shift it in such a way that makes it easier, more fun, or more informative sounds pretty good. It sounds even better when you consider the state of our current reality which is certainly less than stellar. So I have shared in the past about some of my own augmented reality adventures with students as well as several ways for you to create your own extended reality experiences with students and why there is value in it. Here I am going to add one specific AR experience to it. I will walk you through how to create augmented reality learning cubes. So let’s dive in.
AR Learning Cubes

So what is an AR Learning Cube? Well it’s basically just blocks, those basic learning objects we give to young children to start their journey learning about letters, numbers, colors, animals, or whatever else they depict. Now let’s take that a step further to imagine we can print (with paper or 3D printing) our own blocks to cover whatever topic we decide. Do we want our students to learn about biomes, presidents, periodic elements, or take a deep dive to discover and share about themselves? Well we can make some blocks for that. And even in a remote learning environment it can be done with tools as basic as pencils, crayons, and paper.
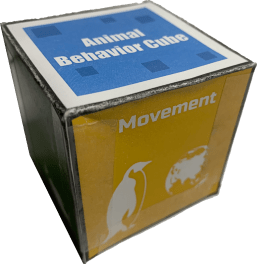
Yes, you can create the blocks, but it is vastly better to have the students create their own. Then we can roll these blocks (much like Rory’s Story Cubes) or simply rotate them in our hands to facilitate discussions on the topic of choice. Now we take that several steps further and have the blocks themselves relay that story or express the student’s understanding to their peers. That is what taking it into the realm of augmented reality can do. It isn’t just about a fun arts and craft project. It’s about developing genuine understanding through creation, the peak of Bloom’s taxonomy. And while I’m only sharing a couple examples for animal behavior and all about me cubes we created, we have explored this across many other topics as simple as letter sounds and as complex as chemistry, and I’m sure you can too.
The creation Process
There are a few things either you or your students will need to know and some tools you will need available in advance to make this work. Keep in mind though, that while I am using the Eyejack app, there are other augmented reality apps that can accomplish similar feats. Most of the prerequisite skills are common an simple enough that most students and teachers can master them even if the sequence is unfamiliar.
Prerequisite Skills
- Creating a slide presentation with animations
- Exporting the presentation (or or taking a screenshot of it) as images
- Exporting presentations as a movie
- Installing the EyeJack Creator app on a computer (Windows or Mac) and Eyejack on a mobile device (iOS or Android)
- Dragging movies and images into an app
- Scanning a QR Code
Instructions

- Create images
- Create the image – This can be done in your favorite presentation app or simply by drawing on paper. If it is a drawing you will need to photograph it. You can do it one side of the block at a time or all at once. You can have each student responsible for a side. The choice is yours.
- Create image files – This can either be exporting from the presentation file, a screenshot, or a photograph of your drawing or 3D printed object.
- Create animation videos – Again this can be any sort of video you decide to develop, but I really like using Keynote since it allows students on iPads to create drawing animations as well as other fun animations. When you are all set, export each side as its own animation video. Or, if you have the skill, export it all at once and then split it into multiple videos afterwards.
- Load images and videos into EyeJack Creator – Select create artwork and then drag in the corresponding image and video. You can add audio if you desire. Repeat this for each side of the cube. You can easily add all 6 art pieces to a collection so they can load together easily. Sign in to save your experiences.
- Load creations into Eyejack – After loading in the files, Eyejack Creator will display a QR code. Use the Eyejack app on your mobile to device to scan it it in and load the experience. You activate the camera by selecting the eye icon on the bottom left. Again, sign in to save your experiences.
- Print & Build Cube – This is pretty self-explanatory. Get some paste or tape or whatever works for you. Like everything else in my district, I like to laminate it first for the sake of longevity, but the seem to still work even when a bit crumpled.
- View in Eyejack – Simply hold the object in front of your mobile device while in the Eyejack app. If you don’t see your camera, click on the eyeball icon on the bottom left. If your animation doesn’t load, press the images icon on the bottom left and make sure your experience is turned on. That’s how you activate all your prior experience too if you’re signed in.
Additional Resources

I am sharing a few other resources with you to help you get started. In addition to the video to guide you above I wanted to share a Blank Cube Printout Template, a completed Science Cube Creator Slides template, and a Completed Science Cube Printable with Eyejack QR Codes. This should be enough, if you have a printer available, to start immediately seeing AR Learning Cubes in action as well as begin making them with students yourself. Have fun with it, and please share with me any of the amazing creations you develop.